The Ofuma Playground: Firing a Prompt at a Real Model
The editor is where a prompt lives. The Playground is where you pull the trigger and watch what comes back: answer, tokens, cost, latency.
By Dumebi ·
Every workshop has the bench where you actually test the thing. Not the drawing board, not the shelf where the finished piece goes, the bench in the middle with the vice and the scorch marks, where you clamp the part down and find out whether it holds.
The Playground is that bench. Everywhere else in Ofuma you are organising prompts, versioning them, gating their release. Here you stop being careful and just run one. You type a prompt, point it at a real model with a real key, press the button, and a real answer comes back with the receipt attached: how many tokens, how much money, how many seconds. No mocks. This is the model actually answering.
Let me walk the whole bench, control by control, and then run something for real.
The page
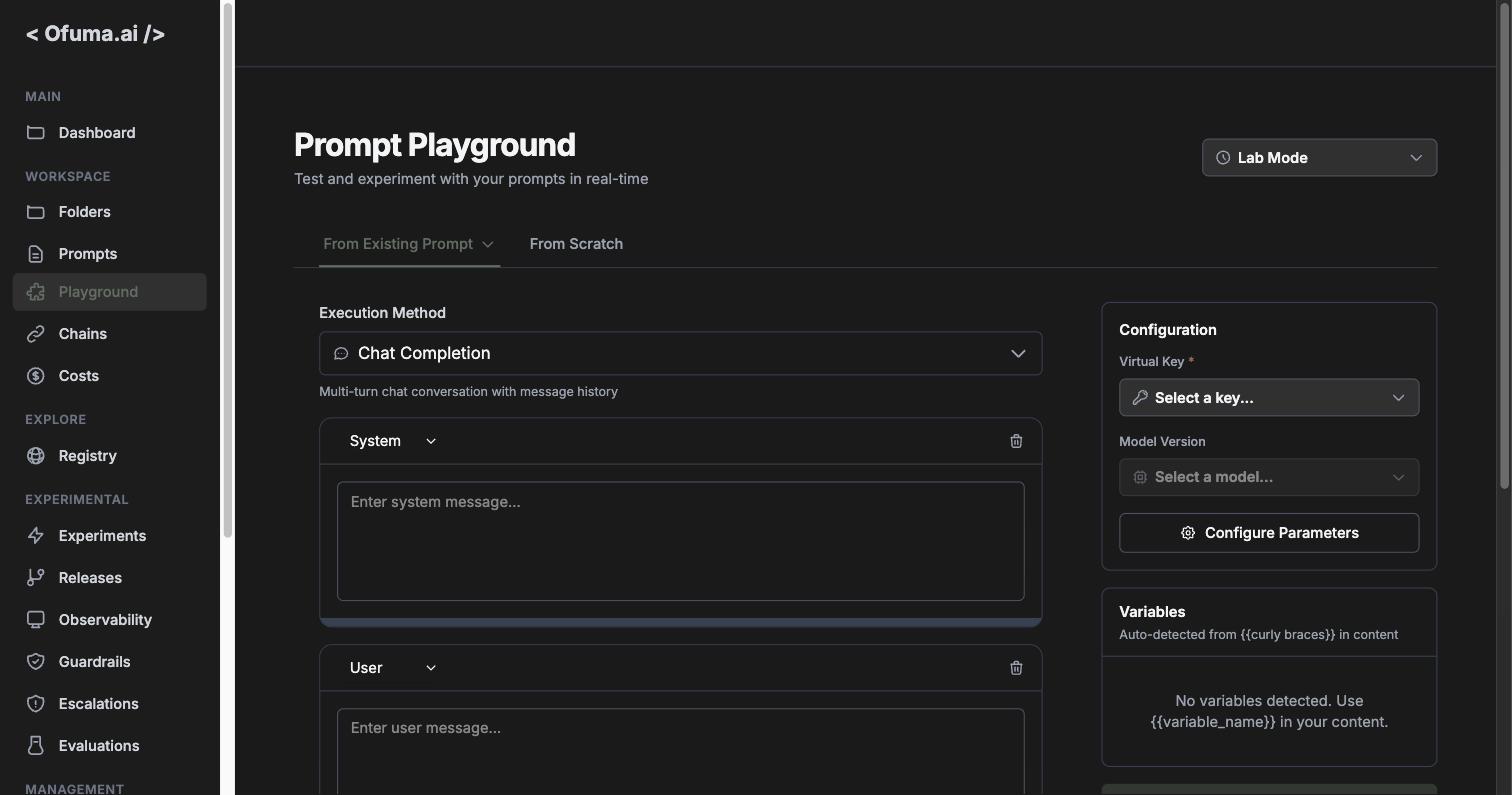
The layout is the same shape as the prompt editor, which is deliberate: your messages in the centre, your configuration on the right. The difference is the big Execute Prompt button at the bottom of the config panel, and the mode selector up in the top right that decides what kind of session this even is.
Start there, because it changes everything below it.
Lab Mode vs Interpolation Mode
The dropdown in the top right, labelled Lab Mode, is not decoration. It picks between two genuinely different tools that happen to share a page.
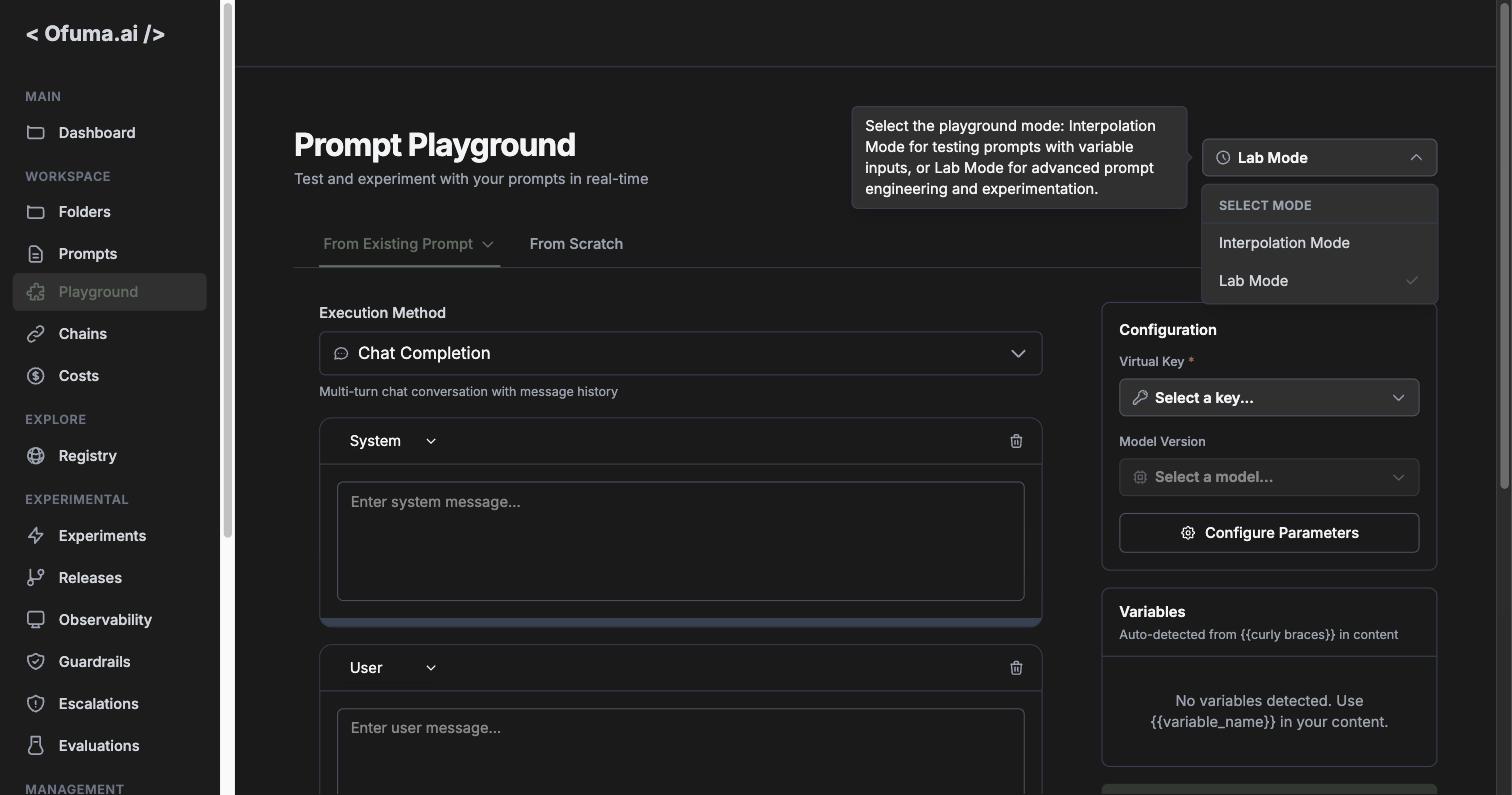
Interpolation Mode is the quiet one. It fills your {{variables}} into the prompt and shows you the result, and it does not call a model. It is for one question only: "with these inputs, what does the final text actually say?" No tokens, no cost, no waiting on a provider. Just the assembled prompt. When you are debugging why a variable is landing in the wrong place, this is faster and cheaper than a real run, because there is no run.
Lab Mode is the full bench, the one this article is mostly about. It actually executes against a model and gives you the answer plus the metrics. This is where you go to find out if the prompt is any good, not just whether it assembles correctly.
The tooltip on the dropdown says it plainly: Interpolation for testing prompts with variable inputs, Lab for advanced prompt engineering and experimentation. Pick the tool that matches the question you are asking.
From Existing Prompt vs From Scratch
Under the title are two tabs, and they answer "where does the prompt I am testing come from?"
From Existing Prompt loads one of your saved prompts. This is testing something that already lives in your library, so the execution is tagged with that prompt and version behind the scenes, which keeps its logs and metrics attached to the real thing.
From Scratch is a blank bench. You write messages fresh, with no saved prompt behind them, and if the run goes well you get the option to save it as a new prompt. This is the "I have an idea, let me try it before I commit to it" path: play first, file it only if it earns its place.
The nice thing about that second path is the direction it runs. Most tools make you create the thing first and test it second. Here you can test first and create second, which is the correct order for anything you are not sure about yet.
Execution Method
This dropdown decides how the model is called, and there are four options. Each one is tagged with the providers that support it, so you can see compatibility before you commit.
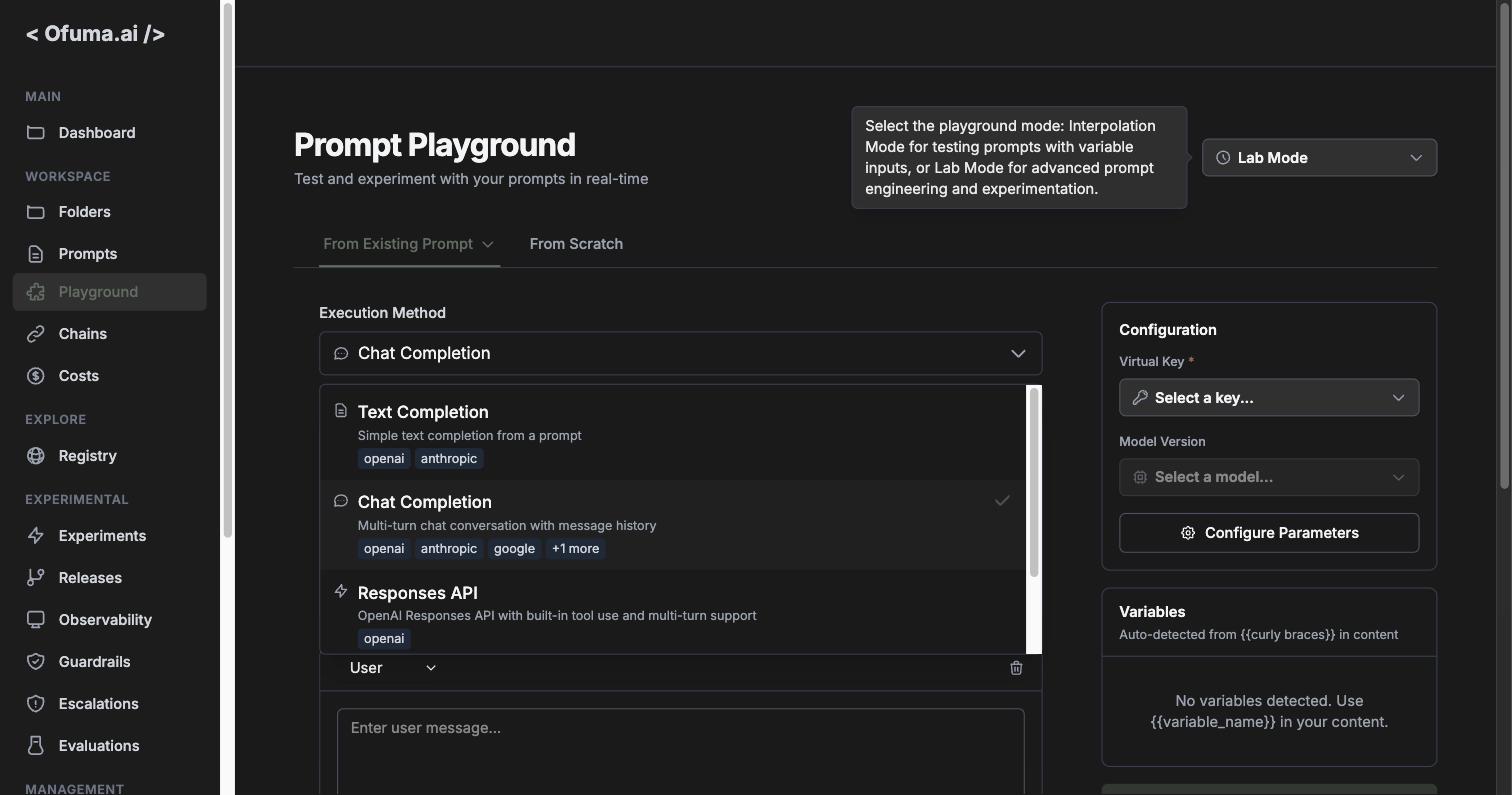
Text Completion: simple text completion from a prompt (openai, anthropic). The old-school single-string call.
Chat Completion: multi-turn chat conversation with message history (openai, anthropic, google, and more). This is the default and the one you want almost always.
Responses API: OpenAI's Responses API with built-in tool use and multi-turn support (openai only).
Image Generation: generate images from text descriptions (openai only).
Those provider tags are doing real work. If you pick a method and then a key whose provider is not in that method's tag list, you have set up a call that cannot happen. Reading the tags first saves you that.
The Configuration panel
The right side is where you point the run at a real credential and a real model. Three things, and the first is required.
Virtual Key is the credential. The dropdown lists the keys you have set up, Anthropic (anthropic) and Open AI (openai) in my case, plus a + Add Provider shortcut if you need a new one. As in the editor, picking the key fixes the provider, so there is nothing to get out of sync.
Model Version is the specific model. Pick your key and a sensible model fills in (GPT 4.1 here), which you can change.
Configure Parameters opens the same model-parameters drawer as the prompt editor: temperature, max tokens, top_p, the whole set. I documented every field of that drawer in the Prompts article, so I will not repeat the table here. It is the same drawer, same defaults.
Variables, detected as you type
This is my favourite small moment in the whole page, because it happens instantly and with zero ceremony.
Type a {{variable}} anywhere in your message and it appears in the Variables panel on the right the very moment you finish the braces. No "add variable" button, no declaring it first. You write {{topic}} and there it is, waiting for a value, with a Required checkbox already ticked.
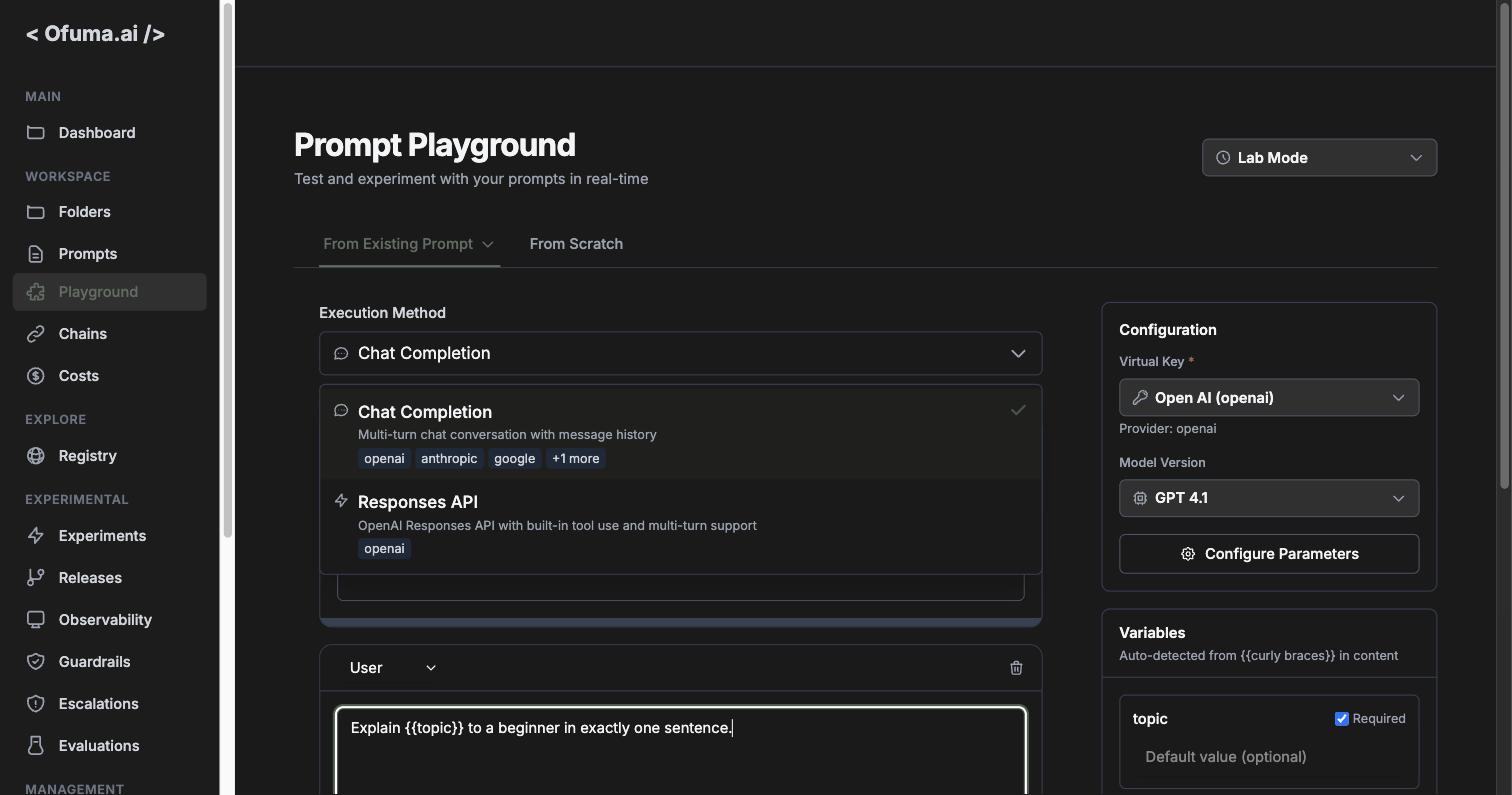
Each detected variable gives you a value box and a Required toggle, exactly like the editor. Fill in the value, and that is what gets substituted when you run.
Running one, for real
Enough describing the bench. Let me clamp something down and pull the trigger.
I wrote one user message, Explain {{topic}} to a beginner in exactly one sentence., picked the OpenAI key and GPT 4.1, filled topic with logprobs, and pressed Execute Prompt. A couple of seconds later:
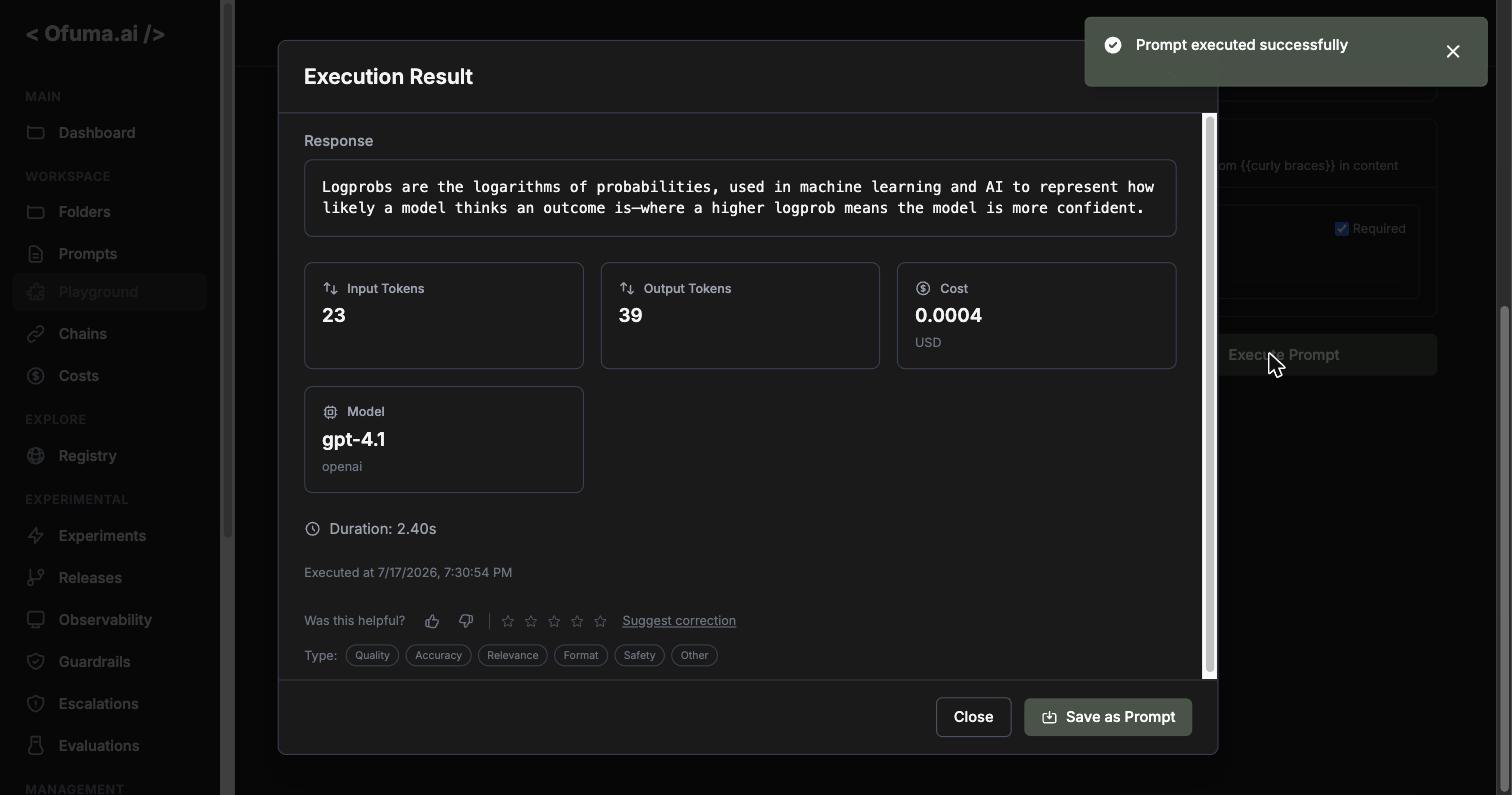
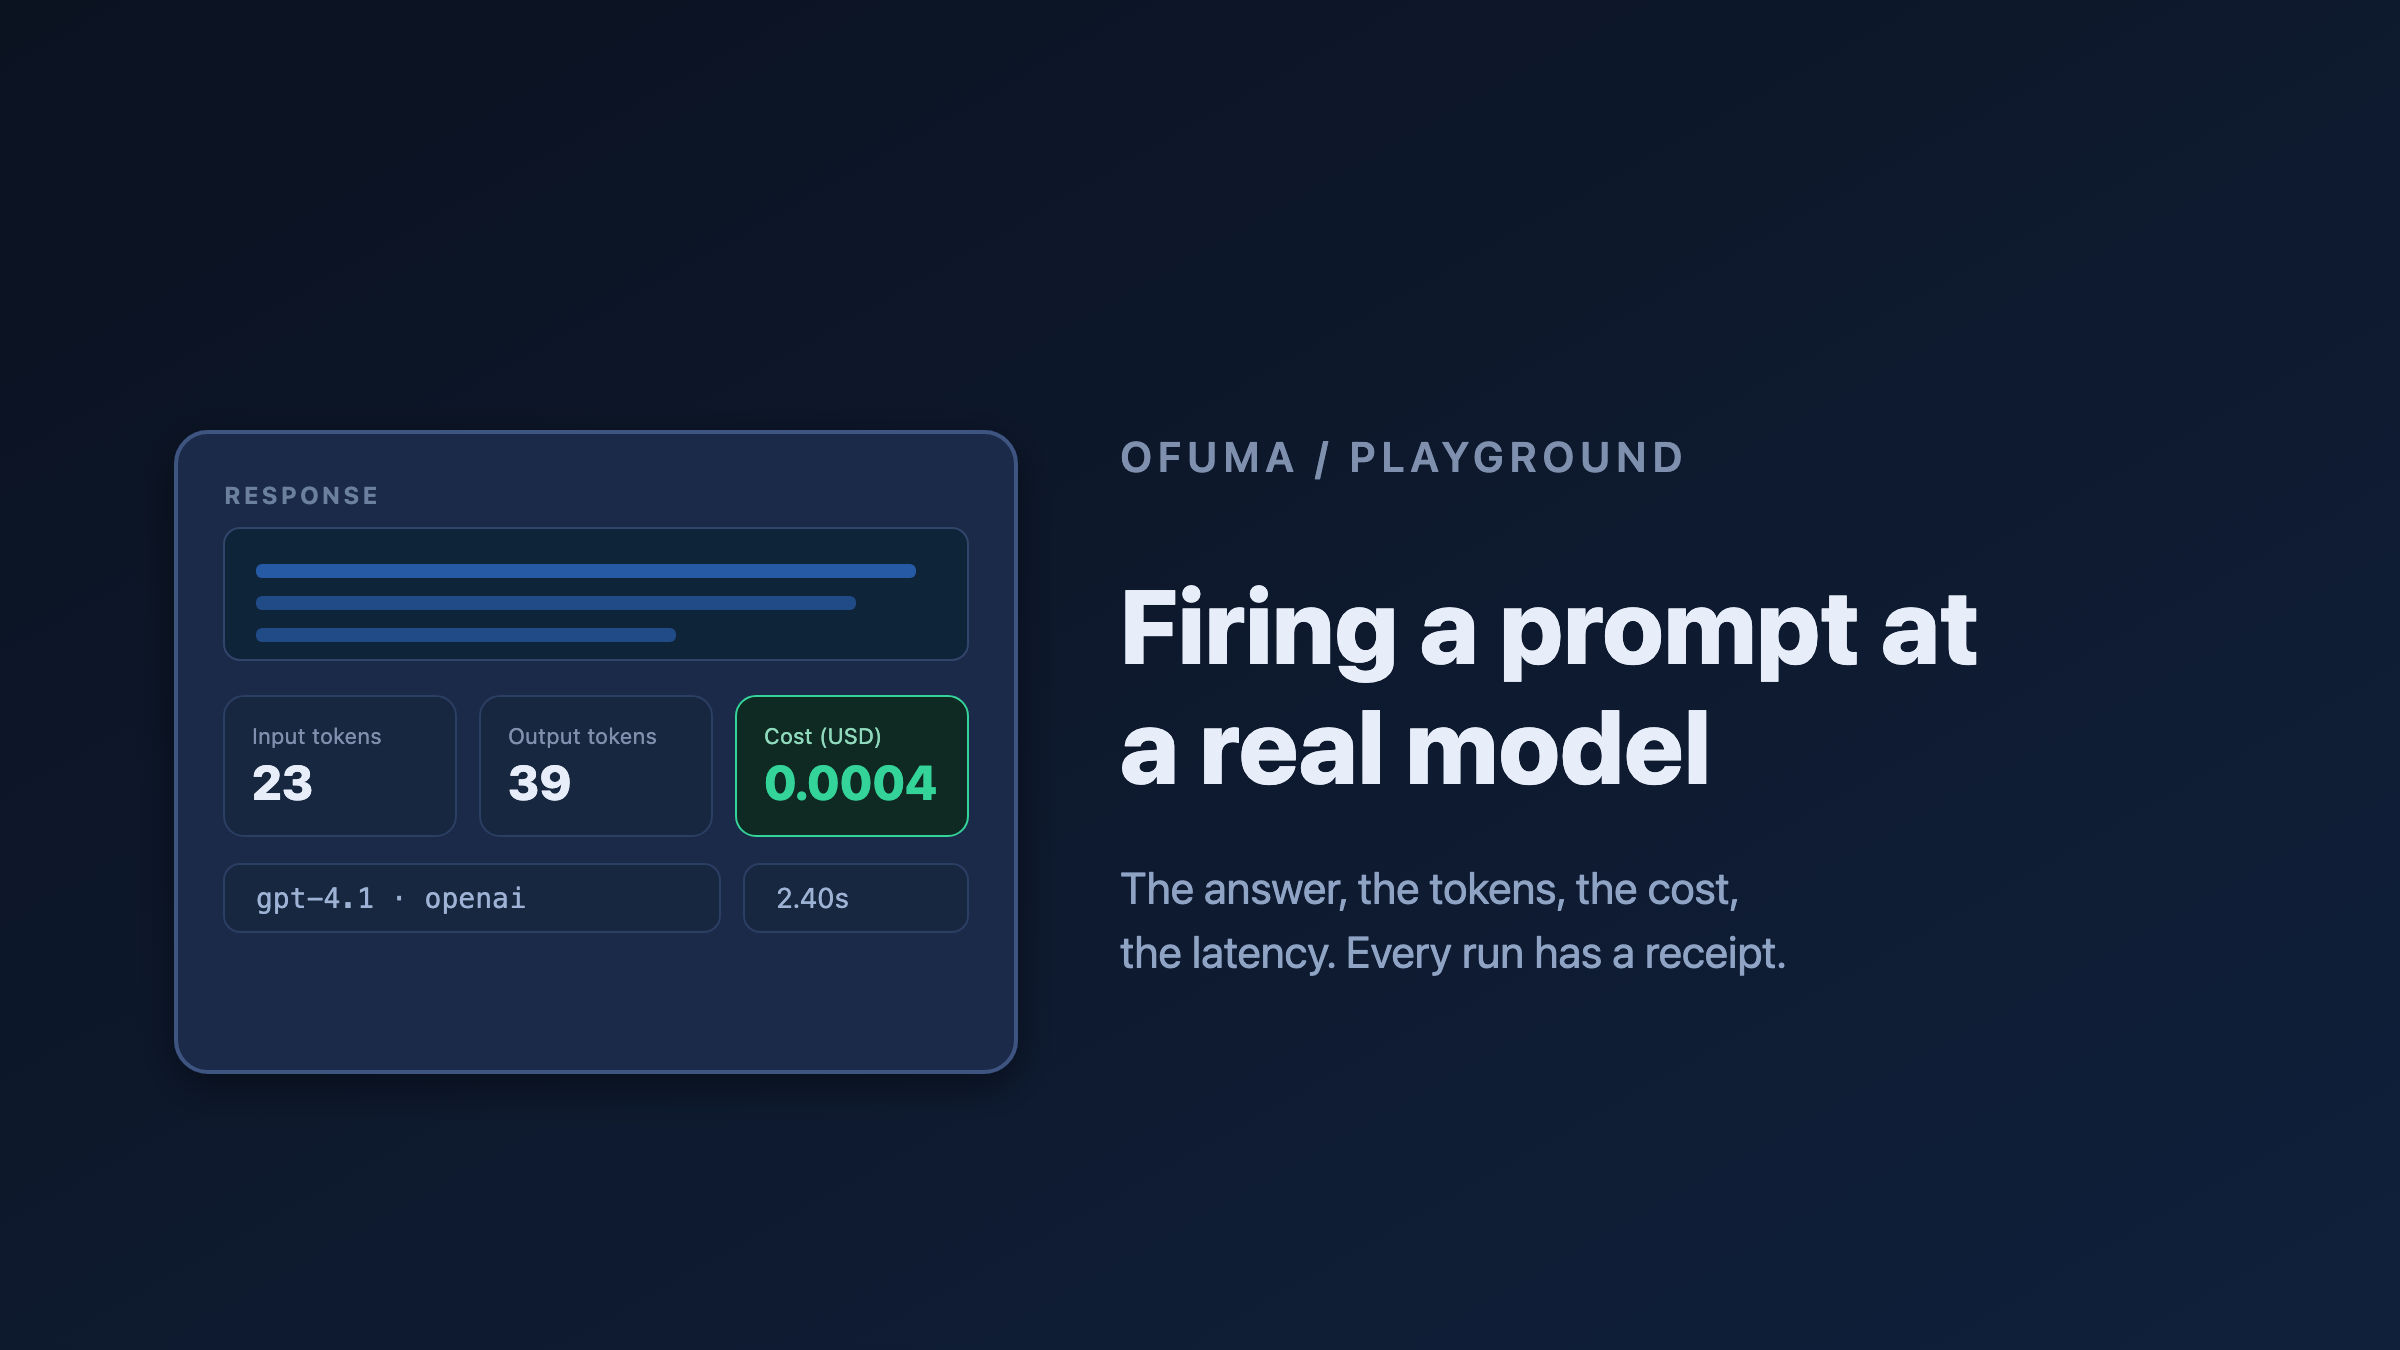
This is the payoff, and look at everything it hands you at once:
The response. An actual, correct one-sentence explanation of logprobs, generated live.
Input Tokens: 23 and Output Tokens: 39. The exact size of what went in and what came back.
Cost: $0.0004. The real money this call cost, not an estimate.
Model: gpt-4.1 (openai). Confirmation of what actually answered.
Duration: 2.40s. How long the round trip took.
That combination is the entire point of the Playground. Anyone can get an answer out of a model. What makes this a bench rather than a chat window is that every run comes with its receipt. You are not just seeing whether the answer is good; you are seeing what it cost and how slow it was, which are the two things that decide whether a good answer is actually shippable. A perfect response that takes eight seconds and costs a cent is a different engineering decision than the same response in two seconds for a fraction of that, and here you can see both before you commit.
Underneath the metrics is a feedback strip: thumbs up or down, a star rating, a Suggest correction link, and type tags (Quality, Accuracy, Relevance, Format, Safety, Other). This is the same feedback machinery the rest of Ofuma runs on. A run you did while experimenting can become a labelled data point without you leaving the page. If you want to know more about logprobs you can check out this article.
Saving a good run
If you started From Scratch and the run came out well, the result gives you Save as Prompt. This is how a five-minute experiment graduates into a real, versioned prompt in your library: you liked what it did, so you keep it, and from that moment it behaves like every other prompt (versions, environments, the lot). When you save, you choose the environment it starts in, and as always a fresh prompt begins its life in development, not straight in production.
That is the loop the Playground is built for: try something rough, watch the real numbers, and promote the winners into the disciplined machinery. Play, measure, keep.
So what is it for?
The Playground exists because the gap between "this prompt should work" and "this prompt works" is where all the surprises live, and the only way across it is to actually run the thing.
Everywhere else in Ofuma is about care: versioning so you can go back, gates so bad changes cannot ship, guardrails so nothing dangerous gets through. The Playground is the one room where you are allowed to just try it, with a real model, and see the truth with the price tag attached. It is the bench in the middle of the workshop, and no amount of careful drawing replaces the moment you clamp the part down and find out.
Next we go to Chains, where "a single prompt run like this one" stops being the whole job and becomes just one box in a much bigger machine. 🔗
Taste and see that the Lord is good. - Psalm 34:8